Tuesday, April 27, 2010

Panko Japanese Breadcrumbs

I just have to share this little tidbit of information. I'd heard of panko breadcrumbs (found in the asian section of the supermarket), but I didn't have any reason to use them until I made the buffalo chicken mac and cheese (see http://practicemakesmeals.blogspot.com/2010/04/recipe-26-buffalo-chicken-mac-cheese.html).... I was then left with quite a bit unused in its box, so I decided to use them to bread some chicken breasts I had.

Wow, what a nice crunchy texture! I'll never use regular breadcrumbs on chicken or fish again... all you have to do is lightly flour the chicken, dip it in beaten egg, and coat with panko, pressing it into the chicken to help it stick. Sprinkle on some dried seasonings if you want. Then fry it up in some hot olive oil in a pan (about 4-5 minutes per side), and you have a moist, flavorful main dish.

To go as a side, I decided to just wing it and create a dipping sauce based on different recipes I'd seen. I added about 5 heaping tablespoons of apricot jam, a small amount of water (less than 1/4 cup) and heated the mixture through until the jam melted. Then I put in a glop of sour cream (my replacement for not having heavy cream) and melted that in. I served it in small bowls for dipping the chicken into, and it was great!

Sometimes less is more when it comes to flavors...

Recipe #29: Eggplant Parmesan

I was in Chuppa's farmers market the other day and was inspired by three perfect little baby eggplants packed together, just waiting for me to purchase them. Except as one of many veggies in a pasta dish, I've never had eggplant before, so I decided to go all out and look for an eggplant parmesan recipe. I found a highly-rated one on allrecipes.com and decided to try it. This is DEFINITELY one I'm going to make again. One thing I like about this recipe is that the eggplant is baked, not fried.


Since I bought three small eggplants instead of regular size ones, my recipe was basically halved, and my eggplant slices were much smaller. Fine by me, because they tasted great anyways!

VERY IMPORTANT PREP STEP: Peel the eggplants and slice them into 1/4" coins. Salt them and place them in a colander for about a half hour. After that time, rinse and pat them very dry before breading them. Do not skip this!

Here's the recipe per allrecipes.com. You can adjust according to the amount of eggplant you have, how much cheese you want, and how many layers you want. Since I had less, I created two layers in a 9x9 casserole dish instead of using a 9x13. ALSO: You might want to bake the eggplant longer than the recipe calls for; I baked them for 8 minutes on the first side and 10 on the second to ensure golden crisp breading.


Ingredients

  • 3 eggplant, peeled and thinly sliced
  • 2 eggs, beaten
  • 4 cups Italian seasoned bread crumbs
  • 6 cups spaghetti sauce, divided
  • 1 (16 ounce) package mozzarella cheese, shredded and divided
  • 1/2 cup grated Parmesan cheese, divided
  • 1/2 teaspoon dried basil

Directions

  1. Preheat oven to 350 degrees F (175 degrees C).
  2. Dip eggplant slices in egg, then in bread crumbs. Place in a single layer on a baking sheet. Bake in preheated oven for 5 minutes on each side.
  3. In a 9x13 inch baking dish spread spaghetti sauce to cover the bottom. Place a layer of eggplant slices in the sauce. Sprinkle with mozzarella and Parmesan cheeses. Repeat with remaining ingredients, ending with the cheeses. Sprinkle basil on top.
  4. Bake in preheated oven for 35 minutes, or until golden brown.

Wednesday, April 21, 2010

Recipe #28: Seafood Cakes with Lemon Creme Sauce

I was very excited to try this recipe I found in one of my new cookbooks, The Wine and Food Lover's Diet. It's a variation of a crab cake that's healthier. The recipe originally calls for crème fraîche, which is a pretty expensive variation of sour cream that I couldn't find at Giant Eagle. I decided to wing it and see how regular sour cream turned out, and much to my delight, it went perfectly with the cakes.

There is one downside to this, which I anticipated even before starting to prep. The idea of putting raw shrimp and raw scallops in a food processor and blending it into a paste just really made me cringe, both for the sight of it (it's a texture thing with me) and the smell (mmm raw seafood... *gag*).... but judging by the picture in the cookbook, I decided it would be worth a try, and I'm so glad I did. And believe me, I did feel the gag reflex coming on after I created the paste, but it all worked out in the end. The seafood cakes were fantastic, and I am so happy with how they turned out!


INGREDIENTS:

2oz sea scallops (about 1/8lb)
4oz large shrimp, peeled and deveined (about 1/4lb)
1/2c freshly grated Parmesan cheese (I just used what I had in the fridge for pasta)
1 egg
1 tablespoon Dijon mustard
Kosher salt
Freshly ground white pepper (I used black since I couldn't find white)
1 jalapeno chile, seeds removed and finely chopped
2 tablespoons coarsely chopped fresh cilantro
Freshly grated zest of 2 lemons (I only used 1, most in the cakes and then the rest in the sauce)
5-6oz cooked crabmeat, picked over and shells removed (I found a can in the seafood section at Giant Eagle that's about 15oz, so I used half of the can in the mixture.)
Juice of 1 lemon
1/2 cup sour cream
2 tablespoons of grapeseed oil (I used olive oil)

DIRECTIONS:

In a food processor, combine the scallops, shrimp, Parmesan, egg, mustard, and salt and pepper to taste. Process until a smooth paste forms. Using a rubber spatula, scrape the mixture into a bowl. Fold in the jalapeno, cilantro, and the zest of one lemon (save some for the sauce). Fold in the crabmeat, being careful to not break up the chunks of crab too much. Cover and refrigerate until ready to cook.

In a small bowl, stir together the remaining lemon zest, the lemon juice, and the sour cream. Set aside.

In a skillet over medium heat, warm the oil until it shimmers. Spoon the seafood mixture, 1/4 cup at a time, into the pan, being careful not to be spattered by the hot oil. You should have 8 cakes. (Tip: Before adding to the pan, I divided the mixture into 8 equal sections on wax paper so it would be easier to add to the pan quickly. I highly recommend this.) Cook until light golden brown on the first side, about 3 minutes. Using a spatula, carefully turn the cakes and cook until golden brown on the second side, about 3 minutes. Remove the cakes to paper towels to drain briefly.


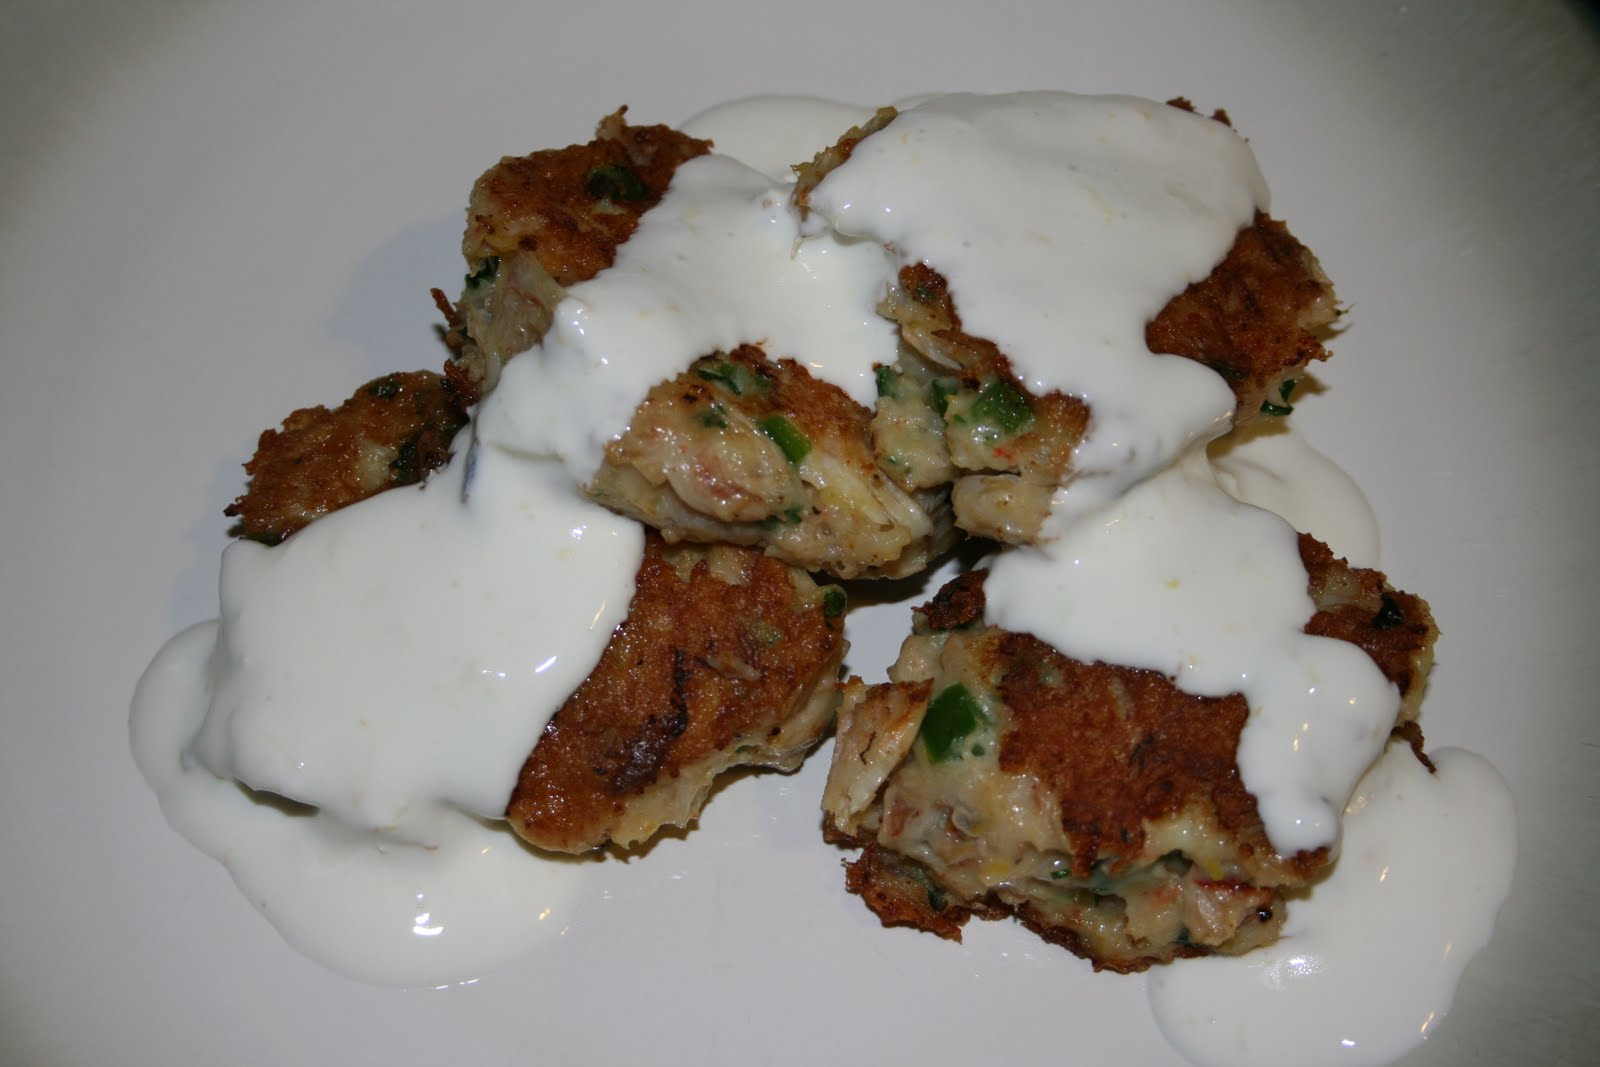
Plate the cakes and serve with the lemon sour cream sauce on top.


Tada!!

Recipe #27: Super Easy Mexican Orange Chicken

Here's a quick and easy, good-for-you chicken recipe adapted from one of my cookbooks. I liked the different take on chicken- I'm so used to lemon chicken recipes, I wouldn't have thought of such a basic orange chicken recipe.


INGREDIENTS:

2 chicken breasts, approx 6oz each
3 tablespoons flour, seasoned with salt and pepper
2 (or more to taste) cloves of garlic, minced
1/4-1/2 cup red onion, coarsely chopped
1/4 cup orange juice
olive oil

DIRECTIONS:

Coat chicken breasts in seasoned flour; shake off excess flour.
Place onion, garlic, and chicken in a skillet with hot olive oil. Brown both sides of the chicken, 2 minutes per side.
Remove chicken breasts and set aside. Pour the orange juice into the pan and deglaze.
Put chicken back in the skillet and cover, cooking on medium heat for 6 minutes or until no longer pink in the middle.

Serve (topping with the onion from the pan) with Mexican rice or your choice of side. Garnish with slices of orange.


We squeezed the orange slices over the chicken. It was very moist, and the onions totally made the dish. The rice is a pack of Uncle Bens Ready Rice, Spanish Style, which only takes 90 seconds in the microwave to be perfect:

Monday, April 19, 2010

Stir Fry

This post won't contain a specific recipe. Instead, it's just here to give you some ideas when it comes to making a stir fry. When I first began cooking dinners that weren't coming from a box or kit, I started making simple stir fries. They're easy to put together and are customized to your own tastes. All you need is a decent sized pan, some olive oil, some sort of meat (or none, even), veggies, and sauce for flavoring. I'd suggest something to serve it on, too, like noodles or rice.

For example, I made this stir fry a few nights ago:


I used everything that was a left over ingredient from other recipes, including chicken, Japanese Udon noodles, frozen peas, snap peas, mushrooms, carrots, white onion, sesame seeds, green and red bell pepper, and garlic. I didn't buy any of the ingredients for this specific meal. That's why I like stir fries- not only are they easy to cook, but you can put a bunch of miscellaneous veggies together to create something that looks like it was planned.

I used some teryaki sauce in a bottle I'd had for another recipe to give this dish its overall flavor. You can use soy sauce, ginger, or any other asian-inspired seasonings

Other meat ideas include cubed beef, shrimp, tofu, or pork.

This is how I make my stir fries: Heat up some oil in a pan. Add garlic and the tougher veggies, like carrots and onion. Cook for a few minutes till they're a little softer, then add the softer veggies like peppers and peas, and also the dry seasonings. Cook for a minute or two, then add the meat. As the meat gets closer to being finished, add the liquid seasonings. Once everything is cooked through, serve over prepared rice or noodles.

I hope to have a wok some day soon, and I just purchased a stir fry cookbook so I can learn more about other options. I'm sure I'll be posting any good recipes, but this is always a simple fall-back dinner for days I don't feel like getting all fancy with my cooking.

Friday, April 9, 2010

Recipe #26: Buffalo Chicken Mac & Cheese

This is one of the more involved recipes I've put together, but every second was worth the end result. Not too hot (although we did have milk with it, just in case) but a nice amount of heat. This recipes comes from Food Network Magazine/foodnetwork.com.


Ingredients

  • 7 tablespoons unsalted butter, plus more for the dish
  • Kosher salt
  • 1 pound elbow macaroni
  • 1 small onion, finely chopped
  • 2 stalks celery, finely chopped
  • 3 cups shredded rotisserie chicken
  • 2 cloves garlic, minced
  • 3/4 cup hot sauce (preferably Frank's)
  • 2 tablespoons all-purpose flour
  • 2 teaspoons dry mustard
  • 2 1/2 cups half-and-half
  • 1 pound yellow sharp cheddar cheese, cut into 1-inch cubes (about 3 1/2 cups)
  • 8 ounces pepper jack cheese, shredded (about 2 cups)
  • 2/3 cup sour cream
  • 1 cup panko (Japanese breadcrumbs)
  • 1/2 cup crumbled blue cheese
  • 2 tablespoons chopped fresh parsley

Directions

Preheat the oven to 350 degrees F and butter a 9-by-13-inch baking dish. Bring a large pot of salted water to a boil; add the pasta and cook until al dente, about 7 minutes. Drain.

Meanwhile, melt 3 tablespoons butter in a large skillet over medium heat. Add the onion and celery and cook until soft, about 5 minutes. Stir in the chicken and garlic and cook 2 minutes, then add 1/2 cup hot sauce and simmer until slightly thickened, about 1 more minute.

Melt 2 tablespoons butter in a saucepan over medium heat. Stir in the flour and mustard with a wooden spoon until smooth. Whisk in the half-and-half, then add the remaining 1/4 cup hot sauce and stir until thick, about 2 minutes. Whisk in the cheddar and pepper jack cheeses, then whisk in the sour cream until smooth.

Spread half of the macaroni in the prepared baking dish, then top with the chicken mixture and the remaining macaroni. Pour the cheese sauce evenly on top.

Put the remaining 2 tablespoons butter in a medium microwave-safe bowl and microwave until melted. Stir in the panko, blue cheese and parsley. Sprinkle over the macaroni and bake until bubbly, 30 to 40 minutes. Let rest 10 minutes before serving.


Side notes: Panko breadcrumbs can be found in the Asian food section (they're Japanese) and the amount of rotisserie chicken called for is basically the entire chicken, so you won't be wasting any of it. Be careful assembling this because all of the ingredients JUST fit in the casserole dish, but it didn't bubble over in the oven. We lined the oven shelf with aluminum foil just in case. Also, I'm not a big fan of blue cheese, but it was good in this recipe. I used a lot of dishes in this recipe, but I was able to reuse my medium pot that I used for cooking the macaroni to make the cheese sauce.

Changes: My changes were minimal. I used shredded cheese instead of a block (it all melts anyways- doesn't matter what shape it's in), used dried parsley because I was too tired to cut up fresh, and regular salted butter.

Tuesday, April 6, 2010

Recipe #25: Tortellini with Peas and Bacon

This recipe from Food Network Magazine originally calls for prosciutto, but Nick and I don't like it. Instead, I used bacon... because everything tastes better with bacon! This meal is so full of flavor! It feeds about 2.


Ingredients


  • Kosher salt
  • 1 pound meat-filled tortellini (you can find this is in the freezer section)
  • 2 tablespoons extra-virgin olive oil
  • 4 ounces prosciutto or pancetta OR BACON, finely chopped
  • 3 cloves garlic, thinly sliced
  • 1 tablespoon tomato paste
  • 1/4 cup heavy cream
  • 1 cup frozen peas, thawed
  • 2 tablespoons chopped fresh parsley
  • 1/2 cup grated parmesan cheese

Directions

Bring a large pot of salted water to a boil. Add the tortellini and cook as the label directs.
Meanwhile, heat a large skillet over medium heat. Add the olive oil and prosciutto and cook until crisp, 3 to 4 minutes. (Note: Bacon will take longer to cook!) Stir in the garlic and tomato paste and cook until fragrant, about 1 minute. Ladle in about 1 cup of the pasta cooking water and simmer until reduced by about half, 3 to 4 minutes. Add the cream and simmer until slightly thickened, 2 to 3 minutes.
About 2 minutes before the tortellini are done, add the peas to the boiling water and cook until just tender. Drain the tortellini and peas and add to the skillet, tossing to coat with the sauce. Stir in the parsley. Sprinkle with the parmesan cheese.

Monday, April 5, 2010

Recipe #24: Mozzarella Chicken Sandwich

This is a simple but delicious recipe to feed 2 people. I found this in one of my Sandra Lee magazines.


INGREDIENTS:
  • Approx 1lb chicken tenders
  • Italian dressing
  • Pepperidge Farm Mozzarella Garlic Bread
  • Red onion, sliced into rings, to taste

DIRECTIONS:
  • Marinate the chicken tenders in italian dressing for a few hours.
  • Preheat the oven to bake the garlic bread according to package directions.
  • While the garlic bread bakes, cook the chicken tenders, whole, in a skillet until done. A few minutes before the chicken is done, add the onion on top to soften them up a little bit.
  • Put the cooked chicken and onions on the bottom half of the baked garlic bread. Place the top on and cut in half.